
Pixelize filter | How to pixelate your video
XMedia Recode allows you to pixelate a video or a section of the video.
This filter obscures details in the selected areas by converting them into coarse, blocky pixels. This can be particularly useful for protecting faces, license plates, or other sensitive information.
By pixelating specific areas in the video, you can anonymize sensitive information.
Advertisement
Step-by-step guide: How to pixelate a video or a section of the video
IIn this guide, we'll show you how to permanently pixelate certain areas of a video—such as faces, license plates, or sensitive information. This ensures that these contents remain unrecognizable, regardless of the device or player the video is played on. Pixelation is particularly useful for protecting privacy or complying with legal requirements.
Step 1: Select the "Filter/Preview" tab and click the "Video Track" tab
You can add the Pixelize filter using the "Add filter" button.
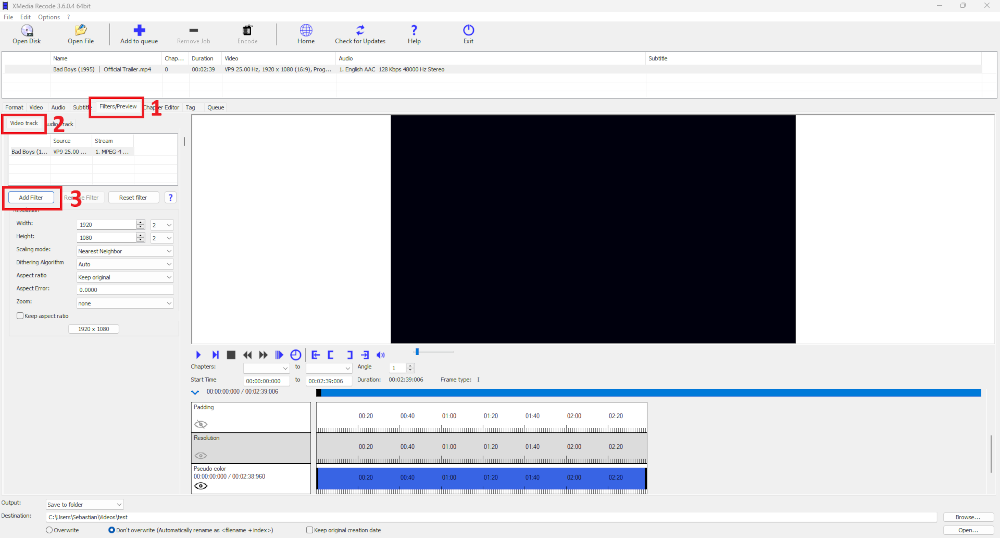
Step 2: Select Pixelize filter and click "Add"
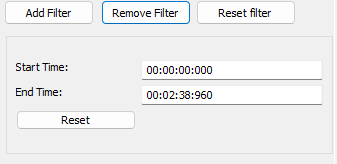
Step 3: Select Pixelize and set settings
Start Time
- Specifies the start time of the filter.
End Time
- Specifies the desired end time of the filter.
Width
- Specify the block width used for pixelation.
Height
- Specify the block height used for pixelation.
Mode
- Sets the pixelation mode used.
Pixelation example
Before-and-after comparison: Use this tool to blur or pixelate faces and other sensitive regions in images.
Before
After